

Open Sesame Garage Door Repair Las Vegas • Summerlin Garage Door Opener Troubleshooting
Garage Door Opener Light Is Blinking in Summerlin: What the Warning Could Mean
A blinking garage door opener light can be useful diagnostic information, but the light itself does not identify the repair until you know exactly which indicator is blinking, how many times it flashes, which opener model you have, and what the garage door is doing when the warning appears. Summerlin homeowners may see flashing main opener lights, diagnostic LEDs, UP and DOWN adjustment arrows, wall-control indicators, or safety-sensor lights. Each can communicate something different. Before resetting the opener or replacing parts, record the pattern and identify the system that is producing it.
A blinking garage door opener light usually means the opener has detected a condition that needs attention, but there is no universal blink code. Depending on the opener, the warning can involve safety sensors, sensor wiring, an obstruction, door resistance, travel settings, programming, motor or drive problems, or another diagnostic fault. Identify the exact light and count the flashes before resetting or replacing components.
First Identify Which Garage Door Opener Light Is Blinking
“Garage door opener light blinking” sounds like one symptom, but a modern residential garage door system can have several different lights capable of blinking.
That distinction is critical.
The large ceiling-mounted opener light may flash after an unsuccessful closing attempt. A small LED near the programming controls may provide a diagnostic code. Some openers use the UP and DOWN adjustment arrows to communicate faults. The photo-eye safety sensors near the floor can have their own indicator lights. A wall console can also contain status lights, and smart openers may provide additional warnings through an application.
These indicators do not all mean the same thing.
If a homeowner says only, “The yellow light is flashing,” there may not be enough information to identify the problem.
The first step is to determine where the light is located.
Is the Large Light on the Opener Motor Unit Flashing?
The main opener light is usually located inside or beside the motor housing mounted to the garage ceiling.
Its normal job is to illuminate the garage when the opener operates. Depending on the opener model, however, flashing after a failed closing cycle can also serve as a warning.
On some systems, the main lights flash when the opener cannot confirm that the safety reversing sensor system is functioning normally.
That can happen because the beam is blocked, a sensor is misaligned, a sensor wire is damaged, or the sensor circuit is otherwise interrupted.
The number of flashes and meaning are model-dependent.
Is a Small LED on the Powerhead Blinking?
Many garage door openers include a smaller diagnostic indicator close to the LEARN button, adjustment buttons, terminal connections, or another control area.
That small LED may intentionally flash in a repeating sequence.
For example, it may flash several times, pause, and repeat.
That pattern should be treated like an error code.
Count the flashes before the pause and watch a second cycle to confirm the count.
Are the UP and DOWN Adjustment Arrows Flashing?
Some newer garage door opener systems use their travel adjustment arrows as diagnostic indicators.
The UP arrow may flash one number of times and the DOWN arrow another number.
Together, those numbers identify a fault category.
The correct interpretation depends on the manufacturer's diagnostic chart for that opener.
Is the Light Near the Bottom of the Garage Door?
If the blinking indicator is only several inches above the garage floor, you are likely looking at a safety reversing sensor.
These photo-eye sensors face each other from opposite sides of the garage-door opening.
A sensor light that is off, flickering, or blinking can point toward alignment, obstruction, wiring, power, or sensor problems.
Is the Wall Console Blinking?
Some wall controls include status indicators for features such as lock mode, connectivity, motion detection, programming, or opener status.
If the wall-control light is blinking while the motor-unit indicator is normal, the warning may relate to the control system rather than to the mechanical garage door.
Check the model-specific documentation before treating the wall-console light as a motor failure.
What It Can Mean When the Main Garage Door Opener Light Flashes
A large opener light that begins flashing after you press the remote can be one of the most noticeable warnings because it illuminates much of the garage.
The warning becomes especially meaningful if it appears at the same time the garage door refuses to close.
On supported opener systems, this behavior can point toward the safety reversing sensor system.
The safety sensors are located near the bottom of the garage-door opening and create an invisible beam across the doorway.
If the opener cannot verify that the beam is clear and the sensor system is functioning correctly, normal closing can be interrupted.
The Door Opens Normally but Refuses to Close
This symptom is an important clue.
Safety sensors primarily protect the closing path.
A garage door with a sensor problem can often open normally because the sensor system does not prevent the door from moving upward away from the floor.
The problem appears when the homeowner attempts to close the garage door.
The opener may begin the closing cycle and reverse, may refuse to move downward, or may produce a flashing warning.
When the door opens normally but will not close and a warning light appears, checking the safety-sensor path should move high on the list.
Look for an Object Across the Sensor Beam
Because the sensors are mounted near floor level, the obstruction may be easy to miss while standing several feet away.
A storage container, tool, bicycle wheel, broom, garden equipment, children's toy, leaf pile, cardboard box, or other object can interrupt the beam even though the main garage opening looks clear.
Move loose items completely away from the sensors and try the door again only after confirming the travel path is clear.
Sensor Alignment Can Produce the Same Warning
The sensor beam can also be interrupted when nothing is physically between the sensors.
If one sensor has been bumped, rotated, loosened, or moved with the track, the receiving sensor may no longer see the transmitter correctly.
A sensor LED may flicker rather than remain steady.
This often points toward marginal alignment.
Wiring Can Be the Real Problem
A perfectly aligned sensor cannot operate normally if its low-voltage wiring is disconnected or damaged.
Look for visible cuts, loose wires, crushed insulation, disconnected terminals, or staples driven tightly enough to damage the wire.
Do not randomly connect wires together to eliminate the warning.
Use the wiring diagram for the installed opener.
Why You Should Not Assume One Flash Count Fits Every Brand
Garage door opener manufacturers have changed diagnostic systems over time.
A flash count that means one thing on one opener can mean something else on a different model or generation.
Even products from the same manufacturer may use different diagnostic methods.
The opener model number matters.
A Small Diagnostic LED May Be Giving You an Error Code
A small blinking LED is often more informative than the large work light because its primary purpose may be diagnosis rather than illumination.
The LED may blink a specific number of times, pause, and then repeat.
The pattern can direct attention toward a particular system.
Depending on the opener, that might include sensor wiring, travel programming, wall-control wiring, motor movement, excessive resistance, or another opener condition.
Count the Flashes Correctly
Stand where you can see the indicator without touching moving opener parts.
Wait for the sequence to begin.
Count every flash until the pause.
Then watch the next sequence.
If the same number repeats, record it.
If the pattern changes, record each sequence separately.
Do Not Reset the Opener Before Recording the Code
Unplugging the opener or clearing programming can remove the visible code before you understand what triggered it.
A short video is often better than trying to remember the sequence.
If you later speak with a garage door technician, the recording can be more useful than saying the light “blinked a lot.”
Find the Exact Model Number
Garage door opener diagnostic charts are model-specific.
Look for the manufacturer's identification label on the powerhead.
You may find a model number, serial number, manufacturing date, or other identification information.
You should not need to dismantle the opener to locate basic product information.
A Code Identifies a System, Not Necessarily the Exact Failed Part
Suppose the opener reports a safety-sensor circuit problem.
That does not automatically mean you need two new sensors.
The beam may be obstructed.
A wire may have been cut.
A terminal connection may be loose.
The receiving sensor may be out of alignment.
A sensor bracket may be unstable.
The diagnostic code narrows the investigation, but the actual failed component still needs to be identified.
UP and DOWN Arrow Lights May Create a Two-Part Diagnostic Code
Some opener systems use the same buttons that program door travel to display diagnostic information.
The UP arrow flashes a specific number of times.
Then the DOWN arrow flashes another number of times.
Those two numbers together form the diagnostic code.
Record the Order Correctly
The order matters.
Count the UP-arrow flashes first.
Count the DOWN-arrow flashes second.
Wait for the sequence to repeat and confirm your count.
Write the code down exactly as observed.
Do Not Guess the Meaning From Another Opener
Online troubleshooting discussions often list blink codes without clearly identifying the opener model.
That can lead homeowners toward the wrong part.
Use the current manufacturer's documentation for the exact opener when available.
Sensor Circuit Codes
A diagnostic system may be able to distinguish between different safety-sensor conditions.
For example, the opener may detect that the expected sensor signal is missing.
That can be caused by obstruction, misalignment, damaged wiring, a loose connection, or a failed sensor.
Do not bypass the sensor circuit simply because it is preventing the door from closing.
Door Resistance Codes
An opener can also react when the garage door requires more force than expected.
That can happen because of a binding track, damaged roller, broken spring, engaged manual lock, cable problem, or another mechanical condition.
The opener may stop the door and produce a diagnostic warning.
In that situation, the warning light is reporting the opener's response to the mechanical problem.
The light itself is not the root cause.
Motor-Movement Warnings
Some diagnostic systems monitor whether the opener motor or drive system moves as expected.
If the opener is energized but the anticipated movement is not detected, a code may appear.
This becomes particularly relevant when the warning is accompanied by a humming or clicking sound.
If your opener warning appears together with that symptom, see the related guide to an opener humming without door movement .
What Blinking Garage Door Safety Sensor Lights Can Mean
The safety reversing sensors are among the most common lights homeowners notice because they are mounted near eye level when crouching beside the garage-door tracks.
They usually sit close to the floor on opposite sides of the garage opening.
One side sends the beam.
The other side receives it.
The exact LED color and behavior varies by manufacturer and model.
A Steady Sensor Light
On many systems, a steady receiving-sensor indicator is a good sign that the beam is being detected.
Do not assume, however, that every sensor is supposed to use the same color.
The transmitting and receiving sensors can have different LEDs.
A Flickering Sensor Light
A flickering LED can suggest that the beam is being received intermittently.
The sensors may be close to proper alignment but not stable.
A loose bracket can allow vibration to move the sensor just enough to interrupt the beam.
A sensor mounted to a track that shifts slightly during door operation can produce the same effect.
A Completely Dark Sensor Light
A dark indicator may mean the sensor is not receiving power, but it does not prove the sensor itself has failed.
The wire may be disconnected.
A terminal can be loose.
A staple or fastener can damage the wire insulation.
A hidden section of wire may be broken.
A sensor can also fail internally.
The circuit should be checked before parts are replaced at random.
The Sending Sensor and Receiving Sensor Can Behave Differently
Homeowners sometimes assume both LEDs should blink or both should be the same color.
That is not necessarily true.
Manufacturer design determines what each indicator means.
Use the opener's actual instructions rather than comparing it to a neighbor's equipment.
Why Safety Sensors Usually Create Closing Problems
The purpose of the photo-eye system is to detect an obstruction in the closing path.
A garage door may therefore open normally even when the sensor system has a problem.
The warning becomes apparent when the homeowner tries to close the door.
That directional behavior is an important diagnostic clue.
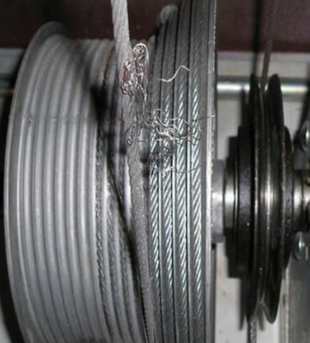
If the garage door opens normally but will not close and a sensor LED is blinking, inspect the beam path, sensor alignment, mounting, and accessible wiring before replacing the opener.
Check for Sensor Obstruction and Misalignment
When a garage door opens but will not close and the opener or sensor light is flashing, the most useful starting point is often the sensor path.
This does not require dismantling the garage door opener.
It requires careful observation.
Clear the Entire Sensor Path
Look from one sensor to the other.
The beam generally runs only a short distance above the floor.
Remove ordinary loose objects that could interrupt that line.
Do not merely move the object one inch away from the sensor.
Move it completely out of the protected area.
Check Both Sensor Faces
A sensor lens can collect dust or garage debris.
Clean the visible lens gently with an appropriate soft cloth.
Do not saturate the electronic sensor with water or harsh cleaner.
Look at the Brackets
A sensor bracket can be bumped by storage containers, lawn equipment, bicycles, vehicle tires, pets, or routine garage activity.
If the sensor is visibly pointing away from the opposite side, alignment deserves attention.
Use the Indicator Light as Feedback
On systems where the receiving LED indicates alignment, the light can provide immediate feedback.
A flickering light may become steady when alignment is restored.
Follow the manufacturer's instructions for that sensor system rather than forcing the bracket.
Why the Problem Can Be Intermittent
A sensor can be positioned right at the edge of acceptable alignment.
The garage door operates once.
Then track vibration or a small movement changes the angle and the beam is lost.
Later, vibration moves it back and the door works again.
This explains why some homeowners experience a door that closes successfully one moment and refuses to close the next.
Sunlight and Bright Conditions
Depending on garage orientation, one safety sensor may face strong daylight at certain times.
If the problem follows a consistent time-of-day pattern, record that observation.
Do not immediately conclude that sunlight is the only cause.
Alignment, wiring, mounting stability, and sensor condition should still be checked.
A Blinking Sensor or Opener Light Can Point to Wiring Problems
Safety sensors depend on low-voltage wiring between the sensor units and garage door opener.
That wiring can fail even when the sensor lenses appear clean and properly aligned.
Inspect the Visible Wire Route
Follow the accessible portion of each sensor wire visually.
Look for cuts, pinches, loose connections, exposed copper, disconnected terminals, or places where the wire has been crushed.
Pay particular attention to staples or fasteners.
A staple driven too tightly can damage insulation or conductor material.
Check the Sensor Connection
A wire can become loose where it enters the sensor or where it connects to the opener.
Do not move wires randomly between terminals.
Use the wiring diagram for the actual opener.
Wiring Can Be Damaged During Other Home Projects
Painting, drywall work, shelving installation, storage changes, pest control, electrical work, or general garage renovation can disturb sensor wiring.
If the blinking problem began immediately after another project in the garage, mention that timing when troubleshooting.
Hidden Wiring Requires Diagnosis
Not every sensor wire remains visible from end to end.
A portion can run behind drywall or framing.
If both sensor units look normal but the circuit still reports a fault, testing may be more useful than tearing open walls or replacing sensors without evidence.
Why a New Sensor May Not Fix Damaged Wiring
A common repair mistake is replacing the component located where the warning is visible.
If the sensor is not receiving power because the wire is broken, a new sensor connected to the same damaged circuit can display the same symptom.
The actual cause must be separated from the warning location.
Garage Door Opener Light Blinking and the Door Will Not Close
A door that opens normally but refuses to close is one of the strongest patterns for separating sensor-related problems from lifting problems.
The opener has already demonstrated that it can power the door upward.
The spring system has also provided at least enough counterbalance for the door to reach the open position.
When closing fails, safety systems, travel, obstruction, wiring, and mechanical resistance deserve attention.
First Look at the Safety Sensors
Confirm that neither sensor is blocked.
Check their LEDs.
Look at alignment.
Inspect accessible wires.
Watch What the Door Does
Does the door remain completely open?
Does it start downward and immediately reverse?
Does it travel several feet before reversing?
Does it reach the floor and then reverse?
These are different symptoms.
Starts Down and Immediately Reverses
This pattern can be consistent with a safety-sensor interruption or other close-cycle issue.
If the opener lights flash at the same time, record the exact pattern.
Reverses Near the Floor
If the door nearly closes and then reverses, travel settings, floor contact, weather seal resistance, door binding, or another close-limit condition may be involved.
Do not automatically realign the sensors if the sensors remain steady and the problem consistently occurs at the same physical point near the floor.
Door Closes Only When Holding the Wall Control
Some opener systems allow a special close behavior from the wall control under certain sensor-fault conditions.
That does not mean the sensor system should be bypassed permanently.
If the door will not close normally from the remote because a safety condition is detected, identify and correct that condition.
Check for Mechanical Resistance Too
A closing problem can also originate with the garage door itself.
A bent track, damaged roller, loose hardware, cable problem, or other mechanical restriction can cause the opener to stop or reverse.
The warning should be interpreted together with the physical movement of the door.
What if the Light Is Blinking and the Garage Door Will Not Open?
A garage door that will not open from the fully closed position requires a different troubleshooting path.
Safety reversing sensors are primarily associated with closing protection, so they usually are not the first explanation for a door that cannot rise.
If the door will not open and a diagnostic light is blinking, look more closely at the mechanical door, opener drive, motor movement, travel system, and counterbalance system.
Check for a Broken Garage Door Spring
Garage door springs counterbalance the weight of the door.
If a torsion or extension spring breaks, the garage door can become much heavier.
The opener may attempt to lift the door, move it only several inches, stop, or generate a diagnostic indication because expected movement did not occur.
Do not increase opener force to compensate for a visibly broken spring.
Look for a Manual Door Lock
Some garage doors have a slide lock or other manual locking mechanism.
If the door is mechanically locked while the automatic opener remains connected, the opener can attempt to move a door that cannot travel. When the fix goes beyond a quick check, our Summerlin garage door repair page explains what each repair involves, how long it takes and what it typically costs.If the door is mechanically locked while the automatic opener remains connected, the opener can attempt to move a door that cannot travel.
That can cause abnormal force, structural stress, or opener damage.
Observe the Trolley and Rail Drive
If the opener sounds as though it is running, check whether the chain, belt, screw drive, or trolley actually moves.
A drive-system failure can leave the door stationary even while the powerhead is energized.
Look for a Crooked Door
If one side begins to rise while the other side remains lower, stop operation.
A cable, spring, roller, track, or balance problem may be involved.
Continuing to run the opener can turn a smaller mechanical problem into additional damage.
Do Not Assume the Blinking Light Means the Logic Board Failed
The opener may be reporting that expected movement did not occur.
The reason could be outside the opener.
Always evaluate the garage door's physical condition before condemning the electronics.
Blinking Light Plus Humming or Clicking: What That Combination Can Mean
A warning light combined with a humming opener adds another useful clue.
It suggests the opener is receiving a command and some portion of the system is being energized, but the expected movement may not be occurring.
Nothing Along the Rail Moves
If the motor unit hums but the chain, belt, screw drive, and trolley remain stationary, an internal opener problem becomes more relevant.
The issue may involve the motor-start system, internal gear, sprocket, coupler, control electronics, or another drive component depending on the opener design.
The Rail Drive Moves but the Door Does Not
If the chain or belt travels but the garage door remains still, inspect whether the trolley or carriage is disengaged.
Someone may have previously used the emergency-release cord and never restored the normal connection.
Door Moves a Few Inches and Stops
This pattern can indicate excessive garage-door weight, a broken spring, track binding, roller resistance, cable problems, or a travel or movement-detection issue.
The physical condition of the door deserves priority.
Burning Smell or Smoke
Stop operating the opener.
A warning light combined with a burning smell, visible smoke, or excessive heat is no longer routine homeowner troubleshooting.
Disconnect power when it can be done safely and have the opener evaluated.
Related Summerlin Troubleshooting
For a deeper explanation of this particular symptom, see the article on an opener humming without door movement .
Blinking Light but the Cause Is Not Obvious?
If the sensor path is clear and the warning keeps returning, the problem may involve sensor wiring, travel controls, garage-door resistance, the opener drive, programming, or internal electronics. Open Sesame Garage Door Repair Las Vegas can help determine what the warning is actually reporting before parts are replaced.
Travel, Force, and Mechanical Resistance Can Trigger Opener Warnings
Garage door openers monitor more than electrical power.
They need to move the garage door through an expected distance and respond appropriately when resistance changes.
When expected movement does not occur, the opener may stop and display a warning.
What Garage Door Opener Travel Means
Travel refers to how far the opener moves the garage door between the fully closed and fully open positions.
If the opener's travel is programmed incorrectly, the door may stop too early, push too hard against the floor, fail to open fully, or reverse at the wrong time.
Do Not Adjust Travel Before Checking the Door
A door that stops before reaching its limit does not automatically have a travel-setting problem.
The garage door can be physically resisting movement.
A broken spring can make it too heavy.
A damaged roller can bind.
A track can be bent.
A cable can be displaced.
A manual lock can remain engaged.
The opener may be correctly recognizing that normal travel is impossible.
Force Settings Are Not a Mechanical Repair
Increasing opener force to overpower a difficult garage door is not an appropriate substitute for repairing the mechanical system.
Springs should counterbalance the door.
Rollers should travel through the tracks without severe binding.
Cables should remain properly positioned.
The opener should automate a garage door that is mechanically capable of moving.
A Broken Spring Can Create an Opener Warning
If a spring breaks, the opener suddenly encounters much more resistance.
The door may begin moving and stop.
The opener may reverse.
A diagnostic warning may appear because expected movement did not occur.
The warning does not turn the problem into an electronic failure.
The spring system still needs attention.
Check for Door Balance Problems
A garage door can have counterbalance issues even without an obviously separated spring.
If the door becomes unusually heavy, difficult to move, or unable to stay where expected, the opener can experience abnormal load.
Do not perform spring adjustments as a homeowner troubleshooting step.
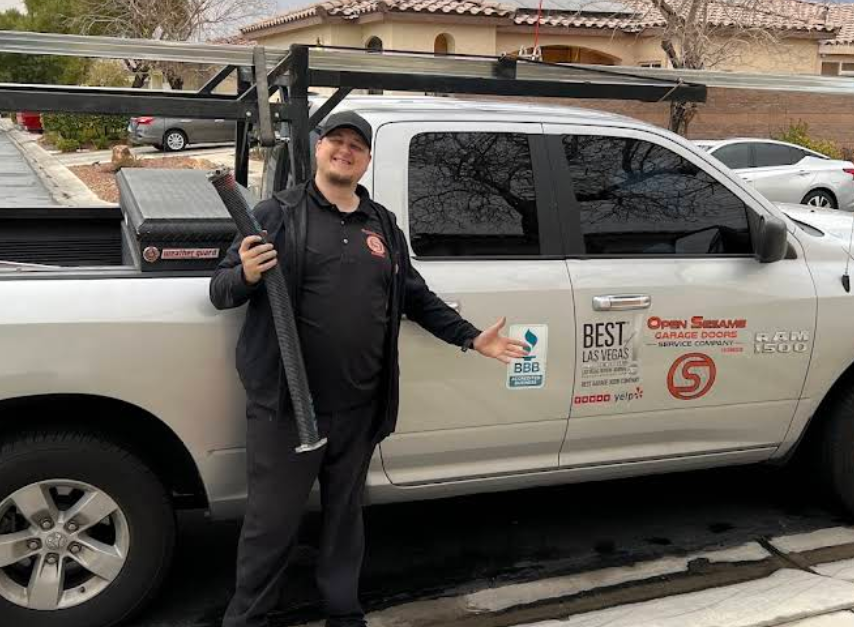
A blinking opener warning can sometimes be the opener reacting to abnormal garage-door resistance. A broken spring or other counterbalance problem should be addressed rather than hidden with force adjustments.
Blinking Lights Can Also Mean Programming or Setup Is Incomplete
Not every blinking garage door opener indicator is announcing a damaged part.
Some lights communicate programming status.
This is especially relevant after a new opener, replacement control board, new remote, new keypad, travel adjustment, or other setup work.
A Newly Installed Opener
A new garage door opener may require travel limits, force learning, wireless controls, or other settings to be completed before normal operation begins.
If a warning appears immediately after installation and the unit has never operated normally, verify the setup sequence before assuming a component failed.
Travel Programming Was Changed
If someone recently changed open or close travel settings, the opener may need the full programming sequence completed.
Randomly pressing adjustment buttons can make the problem more confusing.
Follow the procedure for the exact opener.
A New Remote or Keypad Was Added
Programming indicators can appear while a wireless device is being learned.
If the wall control still operates the door normally but the new remote or keypad does not, the problem may be limited to wireless programming.
That is different from a garage door that cannot physically move.
Do Not Hold the LEARN Button Without Knowing What It Does
On many openers, a brief press and a long press perform different functions.
Holding the LEARN button too long can erase programmed remotes or keypads on some systems.
That can turn one warning-light issue into several new access-control problems.
Power Interruption Does Not Automatically Mean Damage
If a warning appears after an outage, breaker event, surge, or electrical work, record the timing.
However, do not assume the outage damaged the opener simply because the events happened close together.
Check the diagnostic pattern and normal setup requirements first.
Why Garage Door Opener Brand and Model Matter So Much
Garage door opener diagnostic systems are not universal.
This is one of the most important points in the entire troubleshooting process.
A homeowner can find hundreds of online references to red lights, green lights, five flashes, ten flashes, arrow codes, and sensor LEDs.
Those instructions become useful only when they apply to the installed opener.
Chamberlain and LiftMaster Systems
Supported Chamberlain and LiftMaster openers can use diagnostic LEDs, adjustment arrows, safety-sensor indicators, main-light flashing, or connected diagnostics depending on model and production generation.
A current diagnostic chart should be used for the specific opener rather than assuming an older code applies.
Manufacturer documentation is available through the Chamberlain garage door opener diagnostic-code resources .
Genie Systems
Genie openers can also use powerhead indicator LEDs and Safe-T-Beam sensor indicators.
Different Genie generations can use different red or green patterns, programming indicators, and diagnostic sequences.
Check the model number before interpreting the light.
Manufacturer-specific guidance is available through the Genie garage door opener troubleshooting information .
Older Openers
An older opener may use a single small diagnostic LED.
It may have mechanical limit switches and simpler wall controls.
Its troubleshooting process can therefore differ significantly from a newer smart opener.
Newer Smart Openers
A newer opener can combine physical warning lights with application notifications, connected-device status, battery information, and electronic travel diagnostics.
Do not ignore the physical garage door simply because an application provides an electronic warning.
The door can still have a spring, cable, track, roller, or balance problem.
Use the Model Number, Not Just the Brand Logo
Two openers carrying the same brand can use different diagnostic methods.
Model number and generation provide much more useful information than the brand name alone.
Summerlin Garage Door Opener Blinking-Light Diagnostic Table
| What Is Blinking? | What the Door Is Doing | Possible Area to Check | Useful First Step |
|---|---|---|---|
| Main opener light | Door opens but will not close | Safety sensors or close-cycle condition | Check sensor beam, LEDs and alignment |
| Small diagnostic LED | Varies | Model-specific fault | Count flashes before the pause |
| UP and DOWN arrows | Varies | Two-part diagnostic code | Record both numbers in order |
| Receiving safety-sensor LED | Door will not close normally | Alignment or obstruction | Clear beam and inspect alignment |
| Sensor LED completely dark | Closing problem | Power, wiring or sensor fault | Inspect accessible wiring |
| Indicator flashes after door moves several inches | Door stops partway | Door resistance, spring, track, travel or motor movement | Inspect mechanical door condition |
| Warning plus humming | No visible movement | Motor, drive, gear or control problem | Watch rail and trolley movement |
| Warning plus crooked door | One side moves differently | Cable, spring, roller or track problem | Stop operating the door |
| Programming indicator | New opener or control not operating normally | Incomplete setup | Follow model-specific programming |
| Intermittent sensor blinking | Problem comes and goes | Marginal alignment, loose mounting or wiring | Record when the failure occurs |
Safe Checks a Summerlin Homeowner Can Perform
Most useful warning-light troubleshooting can be performed through observation.
You do not need to open a powered motor housing, touch torsion springs, or reconnect lift cables to collect valuable diagnostic information.
- Identify the garage door opener manufacturer.
- Find the opener model number.
- Determine exactly which indicator is blinking.
- Count flashes before the pause.
- Record UP and DOWN arrow flashes separately when applicable.
- Take a short video of the diagnostic sequence.
- Record whether the problem occurs during opening or closing.
- Check whether the garage door opens normally.
- Check whether the garage door begins closing and reverses.
- Look for objects blocking the safety-sensor beam.
- Observe whether both safety-sensor LEDs are illuminated.
- Look for a sensor that is visibly misaligned.
- Clean dusty sensor lenses gently.
- Inspect accessible sensor wiring for obvious damage.
- Check whether the garage door's manual lock is engaged.
- Observe whether the garage door moves crookedly.
- Look for a visible gap in a torsion spring without touching it.
- Observe whether the chain, belt, screw drive, and trolley move.
- Compare the response from the wall control, remote, and keypad.
- Listen for humming, clicking, grinding, or unusual motor sounds.
- Check whether the warning began after programming work.
- Check whether the warning began after electrical work or a power event.
- Consult documentation for the exact opener model.
Start With Observation
One of the most useful habits is to watch the complete operating cycle from a safe position.
Do not stand under the garage door.
Do not place your hands near the trolley, chain, belt, rollers, hinges, or other moving parts.
Simply observe.
Does the door start moving?
Does the opener light begin flashing immediately or only after the door stops?
Does a sensor LED change at the same moment?
Does the motor continue running?
These details help connect the warning to the underlying system.
Record the Sequence Before Resetting
A garage door technician can often do more with: “The UP arrow flashes once and the DOWN arrow flashes three times every time the door reverses” than with: “The opener light is blinking.”
Specific symptoms create more efficient diagnosis.
Do Not Disconnect an Unstable Open Garage Door
If the garage door is suspended open, crooked, extremely heavy, or showing a damaged spring or cable, do not pull the emergency-release cord simply to test manual movement.
A door with failed counterbalance can drop when disconnected.
Do Not Touch the Spring System
Looking for an obvious broken spring is reasonable.
Attempting to repair or adjust the spring is not.
Torsion and extension spring systems can store significant mechanical energy.
What Not to Do When a Garage Door Opener Warning Light Is Blinking
A warning light should help you identify a problem.
It should not lead to bypassing safety equipment or forcing a damaged garage door to operate.
- Do not permanently bypass safety reversing sensors.
- Do not tape sensors together to trick the opener.
- Do not randomly connect sensor wires.
- Do not increase opener force to overpower a binding garage door.
- Do not repeatedly cycle a crooked or off-track door.
- Do not wind or unwind torsion springs.
- Do not loosen spring winding cones.
- Do not remove spring brackets.
- Do not adjust cable drums.
- Do not reconnect lift cables under tension.
- Do not stand beneath an unstable garage door.
- Do not pull the emergency release beneath an unstable open door.
- Do not open an energized opener powerhead to probe electrical components.
- Do not erase programming before recording the diagnostic pattern.
- Do not replace the complete opener solely because an LED is blinking.
Why the Safety System Matters
Automatic residential garage door operators include safety features because a moving garage door can present an entrapment hazard.
The U.S. Consumer Product Safety Commission states that automatic residential garage door operators are subject to a mandatory federal consumer product safety standard.
For broader information about automatic residential operator safety, see the U.S. Consumer Product Safety Commission information on automatic residential garage door operators .
Do Not Treat Safety Sensors as an Annoyance
If the sensor system prevents the door from closing, determine why.
An obstruction may actually be present.
A sensor may not be able to verify a clear path.
A wire can be damaged.
Bypassing the system removes information instead of solving the problem.
Do Not Keep Operating a Damaged Door
If the blinking warning appears together with a loose cable, broken spring, bent track, displaced roller, or visibly crooked door, stop operation.
The electronic warning is secondary to the mechanical safety issue.
Summerlin Garage Door Openers and the Las Vegas Desert Environment
Summerlin is an important residential community within the broader Las Vegas Valley, so local operating conditions can provide useful context when evaluating garage door openers and safety sensors.
The National Weather Service describes the Las Vegas area as a desert valley with abundant sunshine, hot summers, and generally dry conditions.
Those conditions help explain the environment in which garage door electronics and mechanical parts operate.
They do not, however, prove the cause of a particular blinking warning.
Hot Residential Garages
A garage can become considerably warmer than conditioned living space.
The motor, logic board, wiring, battery backup where equipped, sensor electronics, rail system, and other components may spend long periods in that environment.
Heat can be relevant to overall component aging, but a blinking LED should still be interpreted according to the opener's diagnostic system.
Direct Sun Exposure
Depending on the garage orientation, bright exterior sunlight can reach the garage opening and safety-sensor area.
If a sensor-related closing problem consistently appears at a particular time of day, record that pattern.
Still check alignment, wiring, sensor mounting, and physical condition rather than assuming sunlight alone is responsible.
Dust in the Garage
Dry conditions and routine garage activity can allow dust to collect on sensor lenses, tracks, rollers, rails, and other exposed components.
A dusty sensor face is easy to check.
Clean it gently and observe whether the indicator becomes stable.
Attached Garages
Many homeowners use attached garages as a primary daily entrance.
That means the garage door, opener, springs, rollers, hinges, sensors, remotes, and wall controls can receive frequent operating cycles.
Frequent use is not itself a diagnosis.
It simply makes normal wear and maintenance relevant when warning signs appear.
HOA and Residential Communities
Summerlin includes many residential communities where exterior garage doors are a prominent part of the home.
A homeowner may focus first on preserving normal appearance and access, but the safety and mechanical condition of the door should remain the priority when an opener warning appears.
Security Considerations
If the garage door will not close because of a sensor or opener fault, the problem can also affect home access and security.
Do not bypass the sensors to secure the garage.
Instead, identify whether the issue is obstruction, alignment, wiring, mechanical resistance, or another opener condition.
Keep Las Vegas as the Primary Business Geography
This article targets a homeowner searching specifically for a garage door opener light blinking in Summerlin.
The business entity remains Open Sesame Garage Door Repair Las Vegas.
Summerlin functions as a supporting local service-area entity within the broader Las Vegas, Nevada market.
This article does not imply that Open Sesame maintains a separate physical office in Summerlin.
For broader climate context, see the National Weather Service Climate of Las Vegas .
What About Smart Garage Door Openers, Wi-Fi Alerts, and Battery Backup?
Newer garage door opener systems can provide more than a physical blinking light.
The homeowner may see an indicator on the motor unit, receive an application notification, hear an audible warning, or notice a battery status light.
These additional features can be helpful, but they also create more possible indicators to identify.
Wi-Fi or Connectivity Lights
A connectivity indicator can blink because the opener is pairing, disconnected from the network, or waiting for setup.
That does not necessarily mean there is a garage-door mechanical problem.
If the door still opens and closes normally from the wall control, the warning may be limited to connected features.
Smart-App Warning Versus Physical Warning
A smart application may report that the door failed to close or that the opener experienced an error.
That application message should be compared with the physical opener and door.
Look at the safety sensor lights.
Look at the opener indicator.
Observe the door movement.
Connected information is helpful, but it does not replace mechanical inspection.
Battery Backup Indicators
Garage door openers equipped with battery backup can have separate battery-related indicators or audible alerts.
A low or failed backup battery may produce a warning different from a sensor or motor fault.
Check the owner's information for the specific opener.
A Battery Warning Does Not Automatically Mean the Opener Cannot Run on AC Power
On a backup-equipped opener, the battery system and normal household power are related but separate functions.
A battery warning should be interpreted according to the unit's documentation.
Do not replace the complete opener simply because the backup battery requires attention.
Smart Technology Does Not Change Garage Door Physics
A Wi-Fi-connected opener still relies on springs, cables, rollers, tracks, hinges, and a balanced garage door.
If a spring breaks, an application cannot compensate for the missing counterbalance.
If a roller leaves the track, connectivity does not correct alignment.
Electronic diagnostics should always be interpreted alongside the mechanical garage door.
Warning Code Keeps Coming Back After Basic Checks?
If the sensor beam is clear, the LEDs have been checked, and the warning still returns, the problem may involve sensor wiring, garage-door resistance, travel programming, opener movement, or internal electronics. Open Sesame Garage Door Repair Las Vegas can help determine the actual cause before additional parts are replaced.
When Professional Garage Door Opener Diagnosis Makes Sense
Some blinking warnings can be resolved after a simple obstruction is removed or a clearly bumped sensor is realigned according to the manufacturer's instructions.
Other situations require more than visual troubleshooting.
The Sensor Circuit Will Not Stabilize
If the sensor path is clear, both sensors appear aligned, and the warning remains, the problem may involve wiring, electrical connections, a sensor, or the opener's sensor circuit.
Replacing parts without testing can create unnecessary expense.
The Same Diagnostic Code Returns Every Cycle
A repeatable warning is valuable because it shows the opener is detecting the same condition again and again.
Record the code and the point in the operating cycle where it appears.
The Garage Door Is Crooked
Stop operation.
A crooked garage door can involve cables, rollers, tracks, springs, hinges, or door structure.
Continuing to operate the opener can increase damage.
A Spring Is Visibly Broken
The opener is not intended to substitute for a failed spring system.
Do not increase force or repeatedly run the opener.
A Lift Cable Is Loose or Damaged
Garage door cables operate with the spring and drum system.
Do not attempt to reconnect the cable or place it back on a drum while the system may be under tension.
The Opener Hums but Nothing Moves
An internal opener or drive-system problem may be involved.
This can require evaluating the motor, sprocket, gear, coupler, carriage, chain, belt, or control system depending on the opener.
The Opener Smells Burned
Stop operation.
Disconnect electrical power when it is safe.
Do not continue testing the opener merely to see whether the warning changes.
The Warning Does Not Match Available Documentation
If the observed flash pattern cannot be matched confidently to the model, professional diagnosis may be more productive than guessing.
An older opener can have replacement components from another generation, or the homeowner may be watching a different indicator than the one described in the diagnostic chart.
The Door Has Multiple Symptoms
A blinking light combined with abnormal noise, crooked movement, heavy lifting, cable damage, sensor failure, or intermittent control problems can indicate more than one issue.
A complete diagnostic approach should determine which symptoms share the same root cause and which are separate.
12 Questions to Ask Before Approving Garage Door Opener Repair
-
Which exact light is blinking?
Ask whether the warning comes from the motor-unit light, diagnostic LED, travel arrows, safety sensor, or wall control. -
What is the actual flash pattern?
The diagnosis should ideally connect to a recorded code rather than a general statement that a light was blinking. -
Does that code apply to my exact opener model?
Diagnostic meanings vary by manufacturer and generation. -
Does the problem happen during opening or closing?
Direction can help distinguish safety-sensor problems from lifting or counterbalance problems. -
Were the safety sensors checked for obstruction and alignment?
This is particularly important when the door opens normally but will not close. -
Was the sensor wiring checked?
New sensors will not correct a damaged wire elsewhere in the circuit. -
Is the garage door mechanically binding?
Ask whether tracks, rollers, cables, springs, and door balance were considered. -
Is the spring system intact?
A failed spring can make the opener detect abnormal resistance. -
Does the opener drive actually move?
This helps separate motor or drive problems from a disconnected trolley. -
Is the proposed repair correcting the root cause?
Clearing a warning without correcting the condition that triggered it is not a lasting solution. -
Why is complete opener replacement being recommended?
Ask which specific component or function makes replacement more appropriate than repair. -
Will normal safety operation be checked afterward?
The garage door should operate properly with its safety systems active after service.
Garage Door Opener Diagnosis Red Flags
- The complete opener is condemned without anyone identifying which light is blinking.
- The flash pattern is never counted.
- A diagnostic chart for another opener model is used.
- Safety sensors are replaced without checking alignment or wiring.
- A broken spring is ignored while opener force is increased.
- A crooked garage door continues to be cycled.
- The suggested solution is to bypass the safety sensors.
- A blinking light is automatically treated as a failed logic board.
- The garage door's mechanical condition is never checked.
- The opener is repeatedly reset without determining why the warning returns.
- A new opener is recommended solely because an LED is flashing.
- The proposed repair cannot explain the relationship between the code and the symptom.
A diagnostic warning is valuable because it helps narrow the problem.
The goal is to use the warning as evidence rather than to treat it as the repair itself.
Why Consider Open Sesame Garage Door Repair Las Vegas for a Blinking Opener Warning in Summerlin?
Open Sesame Garage Door Repair Las Vegas is a local garage door repair company serving homeowners and residential property customers in Las Vegas, Nevada and relevant communities throughout the Las Vegas Valley.
Summerlin is an important supporting service-area topic for the business, but the official business entity remains Open Sesame Garage Door Repair Las Vegas.
A blinking garage door opener warning can involve several connected systems.
It may be a safety-sensor issue.
It may involve sensor wiring.
It may be a travel or programming warning.
The opener may be reacting to abnormal mechanical resistance from the garage door.
The motor or drive system may not be moving as expected.
The correct repair therefore depends on diagnosis rather than automatically replacing the part closest to the blinking light.
A Useful Diagnostic Sequence
Identify the light.
Record the code.
Identify the opener model.
Determine whether the problem occurs while opening or closing.
Inspect the safety-sensor system where relevant.
Observe the garage door's mechanical movement.
Determine whether the opener drive moves.
Then identify the component responsible for the warning.
Connect the Opener Warning Back to the Garage Door
The automatic opener and physical garage door should not be diagnosed as completely separate systems.
Springs counterbalance the door.
Cables and drums transfer spring force.
Rollers travel through the tracks.
The opener moves the trolley.
The trolley connects to the door.
Sensors protect the closing path.
A problem in one system can produce symptoms in another.
Local Garage Door Opener Help
Homeowners looking for garage door opener repair in Las Vegas can contact Open Sesame Garage Door Repair Las Vegas to discuss the warning pattern and current service availability.
Call (702) 888-0842 .
Summerlin Service Context Within Las Vegas, Nevada
This page specifically addresses homeowners searching for information about a garage door opener light blinking in Summerlin.
The primary business entity remains: Open Sesame Garage Door Repair Las Vegas.
The primary geographic entity remains: Las Vegas, Nevada.
Summerlin is used as an important supporting local service-area entity within the Las Vegas Valley and Clark County context.
The primary ZIP context supplied for the business is 89128.
This article does not create or imply a separate Open Sesame physical office in Summerlin.
The same technical diagnostic principles apply throughout the local service region.
A blinking opener warning should be interpreted according to the actual opener, diagnostic pattern, door movement, safety-sensor condition, and mechanical garage door system.
Related City-Level Warning-Light Guide
Homeowners looking for the broader city-level version of this problem can also review our garage door opener warning lights in Las Vegas guide.
That article covers the same core opener-warning topic at the broader Las Vegas geographic level, while this page focuses specifically on the Summerlin homeowner search.
Frequently Asked Questions About Blinking Garage Door Opener Lights in Summerlin
Why is my garage door opener light blinking in Summerlin?
A blinking garage door opener light usually means the opener has detected a condition that needs attention, but the exact meaning depends on the model and which light is flashing. Common possibilities include safety sensor obstruction, sensor misalignment, damaged wiring, travel or resistance problems, incomplete programming, motor or drive trouble, or another model-specific diagnostic condition.
Why is my garage door opener light flashing and the door will not close?
A safety reversing sensor issue is one common cause when the garage door opens normally but refuses to close. Check the sensor beam for obstructions, observe both sensor LEDs, inspect alignment, and look for obvious wiring damage. The exact warning pattern should still be matched to the installed opener model.
What does a blinking garage door safety sensor light mean?
A blinking or flickering safety-sensor LED can indicate that the receiving sensor is not seeing a stable beam. Obstruction, misalignment, loose mounting, dirty lenses, wiring damage, loss of power, or a sensor fault can be involved. Indicator colors and behavior vary by manufacturer.
Should I count the flashes on my garage door opener?
Yes. Many openers use a repeating blinking pattern as a diagnostic code. Count the flashes before the pause and watch the sequence repeat. If the opener uses separate UP and DOWN adjustment lights, record the number of flashes from each indicator in the correct order.
Why are the UP and DOWN arrows blinking on my garage door opener?
On supported opener models, the adjustment-arrow lights can form a two-part diagnostic code. The pattern may point toward sensors, wiring, travel, abnormal resistance, motor movement, or another opener condition. Use the diagnostic information for the exact opener model rather than a generic online chart.
Can a broken garage door spring cause an opener warning light?
Yes, indirectly. A broken spring can make the garage door dramatically heavier because the counterbalance system is no longer functioning normally. The opener may detect abnormal resistance or lack of expected movement and display a warning. If a spring is visibly broken, stop operating the opener instead of changing force settings.
Can I unplug the opener to clear the blinking light?
Cycling electrical power may clear a displayed warning temporarily, but it does not correct the condition that caused the warning. Record the diagnostic pattern before resetting the opener. If the same warning returns during the next operating cycle, the underlying problem still needs diagnosis.
Does a blinking light mean I need a new garage door opener?
No. A blinking warning alone does not mean the complete opener needs replacement. The problem can involve a blocked sensor, misalignment, wiring, programming, door resistance, travel, a specific motor or drive component, or another repairable condition. Identify the root cause before deciding between repair and replacement.
Can Las Vegas heat cause my garage door opener light to blink?
Las Vegas and Summerlin experience hot desert conditions, and garage door equipment may operate in very warm garages. However, heat should not automatically be blamed for a specific diagnostic warning. Read the actual code and inspect the sensor system, wiring, opener movement, and mechanical garage door condition first.
When should I call a garage door repair company for a blinking opener light in Summerlin?
Professional diagnosis makes sense when the warning repeatedly returns, the safety-sensor circuit cannot be restored, the garage door is crooked or unusually heavy, a spring or cable is damaged, the opener hums without moving, a burning smell is present, or the diagnostic pattern cannot be matched confidently to the installed opener. Open Sesame Garage Door Repair Las Vegas can be reached at (702) 888-0842 to ask about current service availability.
Open Sesame Garage Door Repair Las Vegas on Google Maps
Open Sesame Garage Door Repair Las Vegas serves homeowners and residential property customers in Las Vegas and relevant Las Vegas Valley communities, with Summerlin functioning as an important supporting service-area topic.
View Open Sesame Garage Door Repair Las Vegas on Google Maps
Garage Door Opener Light Still Blinking in Summerlin?
A repeating warning light is useful information. The key is to identify which indicator is blinking, record the flash pattern, determine the garage door opener model, and compare the warning with what the garage door is actually doing.
The underlying problem may involve safety sensors, sensor wiring, opener programming, travel controls, garage-door resistance, a broken spring, the trolley or drive system, the motor, or another electronic component.
Open Sesame Garage Door Repair Las Vegas can help determine what the warning is reporting before sensors, opener components, or the complete garage door opener are replaced.
If the garage door is crooked, unusually heavy, off track, supported by a loose cable, or showing a visibly broken spring, stop operating the system instead of repeatedly trying to clear the warning.
Open Sesame Garage Door Repair Las Vegas
Las Vegas, NV 89128
Summerlin • Las Vegas Valley • Clark County
(702) 888-0842
bestgaragedoorrepairsummerlinnv.com