

Open Sesame Garage Door Repair Las Vegas • Garage Door Opener Warning Light Troubleshooting
Garage Door Opener Light Is Blinking in Las Vegas: What the Warning Could Mean
A blinking garage door opener light can be useful diagnostic information, but the meaning depends on which light is flashing, the opener brand and model, the number or pattern of flashes, and what the garage door is doing at the same time. A blinking main opener light may point toward a safety sensor or closing problem on some systems, while small diagnostic LEDs, UP/DOWN arrows, wall controls, and photo-eye sensors can communicate different warnings. Before replacing the opener, identify the exact light and record its flash pattern.
A blinking garage door opener light usually means the opener has detected a condition that needs attention, but there is no single universal meaning. Depending on the model, flashing can indicate blocked or misaligned safety sensors, damaged sensor wiring, an obstruction, travel or force problems, incomplete programming, motor or drive trouble, or another diagnostic fault. Count the flashes and identify which light is blinking before replacing parts.
Before Troubleshooting, Identify Which Garage Door Opener Light Is Blinking
The phrase “garage door opener light is blinking” can describe several completely different lights on a residential garage door system.
That distinction matters because each light may have a different purpose.
The large work light on the opener powerhead may flash after an attempted closing cycle. A small LED near the LEARN button may be a diagnostic indicator. Newer Chamberlain or LiftMaster equipment can use UP and DOWN adjustment arrows as diagnostic indicators. Genie equipment may have red or green powerhead indicator LEDs. The safety reversing sensors near the bottom of the garage-door tracks also have LEDs that may be steady, off, dim, or flashing.
A homeowner who says, “The red light is blinking,” has not yet given enough information to identify the problem.
The first question should be: Which red light?
The Main Opener Work Light
This is the relatively large light or set of lights built into the garage door opener unit on the ceiling.
These lights normally illuminate when the garage door opener operates and may also be controlled from a wall console.
On certain opener models, a repeated flash pattern after a failed closing attempt is a warning that the safety reversing sensors are obstructed, misaligned, disconnected, or otherwise not being detected correctly.
The exact number of flashes and whether the feature exists depend on the opener generation.
A Small Diagnostic LED Near the LEARN Button
Older and some current openers use a small LED close to the LEARN or programming button.
This LED can flash a repeating number of times, pause, and then repeat the pattern.
The number of flashes acts like an error code.
Counting accurately is therefore more useful than simply noticing that the light is blinking.
UP and DOWN Arrow Lights
Some modern Chamberlain and LiftMaster openers use the UP and DOWN travel adjustment arrows as diagnostic indicators.
The opener may flash the UP arrow a certain number of times and then flash the DOWN arrow another number of times.
Together those two numbers create the diagnostic code.
For example, a code can be described as one UP flash followed by one DOWN flash or four UP flashes followed by two DOWN flashes.
The code should then be interpreted using documentation for the actual opener model or manufacturer diagnostic chart.
Safety Reversing Sensor LEDs
The photo-eye sensors are normally mounted close to floor level on opposite sides of the garage-door opening.
One sensor transmits an invisible beam and the other receives it.
Depending on the opener brand and sensor design, their indicator lights may use different colors and behaviors.
A steady light often means something different from a flickering or completely dark light.
A blinking receiver sensor may point toward alignment, obstruction, wiring, or communication trouble rather than a defective opener motor.
What It Can Mean When the Main Garage Door Opener Light Flashes
When the large opener light flashes immediately after you attempt to close the garage door, the opener may be trying to tell you that a safety condition prevented normal closing.
On certain Chamberlain and LiftMaster systems, repeated flashes have been used to indicate a problem with the safety reversing sensors.
That does not mean every blinking ceiling light on every opener brand has the same meaning.
Manufacturer, model, and production date matter.
A Common Scenario: Door Will Not Close and the Light Flashes
Suppose the garage door opens normally.
You press the remote to close it.
The door does not close normally, and the opener's main lights begin flashing.
In that situation, safety sensor troubleshooting should move high on the list.
The sensors may be blocked by an object.
One sensor may have been bumped and no longer points directly toward the other.
The lens may be dirty.
A wire may be loose, broken, pinched, or shorted.
A sensor may have lost electrical power.
Why the Opener Stops the Closing Cycle
The safety reversing sensors are designed to detect an obstruction across the garage-door opening.
If the opener does not receive the expected sensor signal, it may refuse normal remote-controlled closing because it cannot confirm that the protected area is clear.
That behavior is fundamentally different from a garage door that cannot open because of a broken spring or failed motor.
The same symptom—“the door won't move”—can therefore have very different causes depending on direction.
Do Not Assume “10 Flashes” Applies to Every Opener
Older and certain supported Chamberlain/LiftMaster systems have used ten main-light flashes to indicate a safety reversing sensor issue during closing.
Manufacturer documentation also notes that newer production can use different behavior, so homeowners should not assume that the absence of ten flashes proves the sensors are working.
The safest approach is to identify the model and compare the actual behavior with that opener's diagnostic information.
For current manufacturer guidance, see Chamberlain garage door opener diagnostic codes .
What if the Main Light Flashes but the Door Still Closes?
The meaning may be different from a normal sensor-related close failure.
The light can also be controlled by wall-console features or by other model-specific functions.
Do not replace the sensors merely because a light flickers once.
Observe whether the warning repeats during every closing cycle and whether the garage door reverses, stops, refuses to move, or closes normally.
A repeatable pattern is much more useful for diagnosis than a single unexplained flash.
A Small Diagnostic LED Can Be Flashing an Error Code
Many garage door openers contain a small indicator LED intended specifically for diagnostics.
Unlike the large work light, this LED may communicate information through a repeating pattern.
The light may flash one or more times, pause, and repeat.
That pause is important because it separates one code cycle from the next.
Count the Entire Pattern
Do not simply report that the LED is “flashing fast.”
Watch long enough for the sequence to repeat.
Count the number of flashes before the pause.
Then confirm the same number occurs during the next cycle.
If the opener uses more than one indicator, count each separately.
Do Not Use a Diagnostic Chart From the Wrong Opener
A one-flash pattern on one Genie opener does not necessarily mean the same thing as one flash on another brand or another opener generation.
Even within a single manufacturer, diagnostic systems can change over time.
The color of the LEARN button, presence of travel arrows, opener model number, or date of manufacture may determine which diagnostic chart applies.
Why Model Identification Matters
Look for the opener's model label before searching for the meaning of a code.
The label is often located on the motor housing or beneath a light cover, depending on the design.
You do not need to disassemble the opener.
Write down the manufacturer and model number.
If the label shows a serial number or production date, that information can also help distinguish between different generations.
Diagnostic Lights Are Clues, Not Complete Diagnoses
A code that points toward a sensor circuit does not automatically tell you which sensor component has failed.
The beam could be obstructed.
The receiving sensor may be misaligned.
A wire could be damaged.
A connection at the opener could be loose.
The sensor itself could be faulty.
The diagnostic code narrows the system that needs attention; the next step is still to determine the actual cause.
UP and DOWN Arrow Lights May Form a Two-Part Diagnostic Code
Some Chamberlain and LiftMaster garage door openers use the adjustment arrow lights to communicate diagnostic codes.
This system is especially useful because the opener can distinguish between several different sensor, travel, motor, and control conditions without needing a text display.
How to Read the Pattern
Stand where you can see the opener controls safely.
Count how many times the UP arrow flashes.
Then count how many times the DOWN arrow flashes.
Wait for the sequence to repeat.
Record the code in the same order: UP flashes first, DOWN flashes second.
For example, if the UP arrow flashes once and the DOWN arrow flashes twice, record it as a 1-2 pattern.
Sensor-Related Codes
Supported Chamberlain/LiftMaster diagnostic systems use certain low-number codes for safety reversing sensor faults.
Those faults can involve a blocked or misaligned sensor, a disconnected wire, or wiring that is shorted or reversed.
The precise code should be matched to current manufacturer documentation for the installed opener.
Door Resistance and Travel Codes
Other diagnostic patterns can indicate that the garage door encountered excessive resistance, stopped unexpectedly, or could not complete the expected travel.
That does not automatically mean the electronic travel system is bad.
A broken spring, door lock, damaged track, roller problem, or other mechanical obstruction can create resistance that the opener detects.
The mechanical garage door should therefore be evaluated before a force or travel setting is used to compensate for the symptom.
Motor and Movement Detection
Some codes can relate to whether the opener detects expected motor rotation or movement.
That becomes relevant if the opener clicks, hums, or attempts to start without moving the door normally.
If your blinking warning appears together with a motor sound but little or no door movement, the problem may require a different diagnostic path.
See our related guide to an opener humming without door movement for that specific symptom.
Do Not Clear the Code Before Recording It
Unplugging or resetting the opener immediately can erase useful information.
Before cycling power, record the flash pattern.
If possible, take a short video of the indicator.
That gives you or a garage door technician something concrete to compare with the manufacturer's diagnostic chart.
Blinking Safety Sensor Lights Can Point to Alignment, Obstruction, or Wiring Problems
If the blinking light is down near the garage floor rather than on the opener powerhead, you are probably looking at one of the safety reversing sensors.
These sensors face one another across the garage-door opening.
Their purpose is to detect whether an object interrupts the protected beam while the automatic door is closing.
Why One Sensor May Look Different From the Other
Depending on the manufacturer, the sending and receiving sensors may use different LED colors or behaviors.
One may remain steadily illuminated whenever it has power, while the other indicates whether alignment and beam reception are correct.
Do not assume both sensor lights are supposed to be the same color.
A Flickering Sensor Can Be an Alignment Clue
If a receiving sensor LED flickers when the sensor or track is touched, alignment may be marginal.
A track can be bumped by a trash can, bicycle, storage bin, broom, vehicle tire, or routine movement in the garage.
Even a small change can move the sensor enough that the receiving unit no longer sees the beam consistently.
A Completely Dark Sensor
A sensor LED that remains completely dark may have lost power.
Possible explanations include a disconnected wire, damaged wire, loose terminal connection, failed sensor, or another circuit issue.
Do not immediately buy a replacement sensor.
Inspect the accessible wiring first for obvious damage.
Why Sensor Problems Usually Affect Closing
Safety reversing sensors primarily protect the closing path.
A sensor issue commonly allows the garage door to open but prevents normal remote-controlled closing.
That directional clue is extremely useful.
If your garage door cannot open from the fully closed position, sensor alignment is usually not the first issue to investigate.
If the door opens normally but refuses to close while a sensor LED or opener light flashes, safety-sensor diagnosis becomes much more relevant.
Manufacturer Guidance
Genie also uses indicator lights in its Safe-T-Beam and opener diagnostic systems, but the exact colors and blink patterns depend on the product.
For model-specific examples, review the Genie garage door opener diagnostic-light guide .
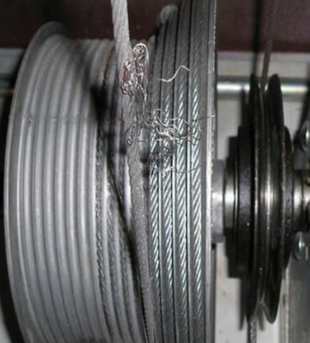
When a garage door opens normally but will not close and sensor or opener lights are flashing, inspect the safety-sensor path, alignment, wiring, and indicator behavior before replacing the garage door opener.
Check for a Blocked or Misaligned Safety Sensor Before Replacing Parts
A blocked safety-sensor beam is one of the simplest reasons an automatic garage door may refuse to close.
The opening can look clear from standing height while something near the floor interrupts the beam.
Because the sensors are mounted low, relatively small objects can matter.
Look Across the Entire Beam Path
Check the space between both sensors.
Move ordinary objects such as storage boxes, tools, leaves, toys, garden equipment, or other loose items completely away from the sensor path.
Do not place your body underneath a moving garage door while checking.
Clean the Sensor Lenses Carefully
Dust and ordinary garage debris can collect on the sensor face.
Use an appropriate soft, dry cloth to clean the visible lens without flooding the sensor with liquid.
A dirty lens is not always the cause, but it is a simple condition to eliminate.
Look at Alignment
The two sensors need to face one another sufficiently for the receiving sensor to detect the beam.
If one bracket is visibly twisted or the sensor points toward the floor or away from the opposite side, alignment deserves attention.
Some systems allow minor adjustment of the sensor bracket according to the manufacturer's instructions.
Do not alter track hardware or other structural components simply to aim the sensor.
Watch the LED While Making a Small Alignment Correction
On systems where the receiving LED indicates alignment, the light can help show when the beam has been restored.
A flickering light may become steady when the sensors are correctly aligned.
Confirm the behavior using the owner's manual for the actual opener rather than assuming one brand's LED behavior applies to another.
Why the Problem Can Seem Intermittent
A sensor can be only slightly out of alignment.
Vibration from the garage door, movement of the track, heat expansion, or a bracket that is not secure can allow the beam to work at one moment and fail at another.
That can produce a frustrating problem where the garage door closes normally several times and then suddenly refuses to close.
Intermittent failure is another reason to observe the sensor LEDs rather than simply pressing the remote repeatedly.
Blinking Lights Can Also Point to Safety Sensor Wiring Problems
If the sensor path is clear and alignment appears correct but the warning continues, the wiring deserves attention.
Low-voltage wires usually connect the sensors to the garage door opener.
Those wires can be damaged even when the sensor housings look perfect.
Look for Obvious Physical Damage
Inspect only the accessible portions of the low-voltage sensor wire.
Look for cuts, crushed sections, loose staples, exposed copper, disconnected terminals, or a wire that has been pulled away from the sensor.
A storage item or home-improvement project can damage wiring without damaging the sensor itself.
Check Connections Without Shorting the Wires
Loose wire connections at a sensor or opener terminal can interrupt communication.
Do not randomly connect wires together.
Different models use specific terminal positions and wire polarity or color conventions.
Follow the manufacturer's wiring diagram.
Shorted or Reversed Wires
Some diagnostic systems can distinguish between a disconnected sensor circuit and wiring that has been shorted or reversed.
That is one reason counting the actual diagnostic flashes matters.
The opener may be telling you more than simply “the sensors aren't working.”
Wall Damage Can Hide the Problem
A wire may run behind drywall or framing for part of its route.
If the visible wiring and sensors appear normal but the circuit still does not function, the inaccessible portion may require testing rather than guesswork.
Do not tear into walls solely because an opener light is blinking.
First verify the code, sensor power, visible connections, and model-specific diagnostic instructions.
Garage Door Opens but the Warning Light Flashes When You Try to Close It?
That pattern can point toward safety-sensor alignment, wiring, obstruction, or another opener diagnostic condition. Open Sesame Garage Door Repair Las Vegas can help identify which system is producing the warning before sensors, wiring, or the complete opener are replaced.
A Blinking Diagnostic Light Can Point to Travel, Force, or Door Resistance Problems
Not every blinking warning is caused by photo-eye sensors.
Garage door openers also need to know how far the door should travel and whether the door is moving with reasonable resistance.
If the expected movement does not occur, some opener systems store or display a diagnostic code.
What “Travel” Means
Garage door opener travel refers to the programmed distance between the fully closed and fully open positions.
The opener needs to stop at the correct point in each direction.
If the travel setting is incorrect, the door may stop too early, continue pressing after reaching the floor, reverse unexpectedly, or fail to reach the intended position.
Do Not Adjust Travel Until the Door Itself Has Been Checked
A door that stops before reaching the programmed position does not automatically have a travel-setting problem.
The garage door may be binding.
A roller may be damaged.
The track may be obstructed.
A spring may be broken.
A manual lock may still be engaged.
A cable may be displaced.
The opener can interpret mechanical resistance as abnormal travel.
Force Is Not a Cure for a Sticking Garage Door
A garage door opener is not supposed to overpower a mechanically defective door.
If the garage door is unusually heavy, crooked, binding, or difficult to move because of mechanical damage, increasing force is not the proper solution.
Doing so can place additional stress on the opener and can interfere with the intended safety behavior of the system.
Broken Springs and Diagnostic Warnings
Garage door springs counterbalance the weight of the door.
If a spring breaks, the opener may detect much greater resistance than normal.
Depending on the system, the door may move only a short distance, stop, reverse, or create a diagnostic indication.
Do not keep adjusting opener settings when the counterbalance system is visibly damaged.
Check for a Manual Door Lock
Some garage doors have a mechanical slide lock or other manual locking mechanism.
If the door has been manually locked while the automatic opener remains connected, the opener may attempt to move a door that physically cannot travel.
That can create abnormal resistance and potentially damage the door or opener.
Check whether a manual lock is engaged before repeatedly cycling the opener.
Blinking Diagnostic Codes Can Sometimes Point Toward Motor or Drive Problems
When a blinking code appears together with unusual opener sounds, little or no door movement, or repeated stopping, the failure may extend beyond the sensor system.
Garage door openers contain a motor and mechanical drive components that transfer motion to the trolley.
Depending on the opener design, the system may monitor whether expected motor or door movement occurs.
Humming With No Rail Movement
If the opener hums but the chain, belt, screw drive, and trolley do not move, an internal opener problem becomes more relevant.
Possible areas include the motor-start system, internal gears, drive sprocket, coupler, or electronic control components.
The exact cause should not be guessed from the blinking light alone.
Drive Moves but Door Does Not
If the opener rail mechanism moves while the garage door remains stationary, check whether the trolley or carriage is disengaged.
The emergency release may have been used previously and never fully re-engaged.
A disconnected trolley can make the opener appear to operate normally while the garage door stays still.
Door Moves Several Inches and Stops
This pattern can involve a broken spring, heavy or binding door, damaged track, cable problem, travel-system problem, or motor-movement diagnostic condition.
Look at the mechanical garage door before treating the warning as an electronic-only failure.
Burning Smell or Excessive Heat
Stop operating the opener if it produces a burning smell, visible smoke, or severe heat.
A blinking code combined with those symptoms is no longer a simple homeowner adjustment issue.
Disconnect power when it can be done safely and have the opener evaluated.
Why the Previous Symptom Guide Matters
If your current blinking warning is accompanied by a motor that hums while the garage door remains still, the flashing light and mechanical symptom should be diagnosed together.
Our related article on an opener humming without door movement explains how to separate trolley, drive-system, spring, door-resistance, and internal opener problems.
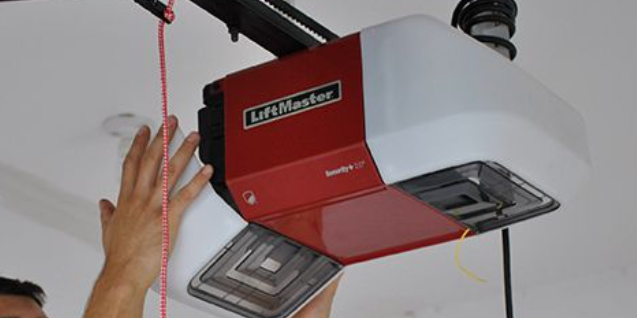
A repeating diagnostic pattern can narrow the problem, but the warning should be interpreted together with the garage door's actual movement, sensor behavior, and opener model.
Blinking Lights Can Also Indicate Incomplete Programming or Setup
A blinking light is not always reporting a failed component.
Some openers use their indicator LEDs to show that programming has not been completed or that a wireless device has not yet been learned.
This becomes especially relevant after a new opener, replacement logic board, remote, keypad, travel module, or other control component has been installed.
New Opener That Has Never Completed Setup
If an opener is newly installed and an indicator remains illuminated or blinks before normal operation has ever been established, do not immediately assume a part has failed.
The opener may still require travel-limit programming, force learning, or another setup procedure.
Follow the manual for the actual model.
New Remote or Keypad
Some indicator patterns can relate to wireless programming.
If the garage door operates normally from the wall control but a newly added remote or keypad does not work, the blinking indicator may be part of the learning process rather than evidence of a mechanical garage door problem.
Power Was Recently Interrupted
A brief power interruption does not normally mean every opener loses all programming, but the behavior depends on equipment design and what occurred during the outage.
If the warning appeared immediately after electrical work, a surge, a breaker event, or another power problem, note that timing when troubleshooting.
Travel Programming Was Recently Changed
If someone recently adjusted the opener's travel limits or replaced a travel-related component, the warning may relate to incomplete or incorrect setup.
Do not continue changing settings randomly.
Return to the manufacturer's programming sequence for that model.
Avoid Erasing Wireless Memory Without a Reason
Holding a LEARN button for an extended period can erase programmed wireless devices on some opener systems.
A homeowner trying to clear a diagnostic light can accidentally create a second problem where previously working remotes and keypads stop functioning.
Record the warning first and understand the button's purpose before holding it down.
Garage Door Opener Blinking-Light Diagnostic Comparison
| What Is Blinking? | What the Door Does | Possible Meaning | Safe First Check |
|---|---|---|---|
| Main opener work light | Door opens but will not close | Safety sensor issue on some opener models | Check sensor path, LEDs and alignment |
| Small LED near LEARN button | Varies | Model-specific diagnostic code | Count flashes and identify opener model |
| UP/DOWN adjustment arrows | Varies | Two-part diagnostic code | Record UP flashes and DOWN flashes |
| One safety sensor LED | Door will not close normally | Misalignment, obstruction or sensor communication problem | Clear beam and compare both sensor LEDs |
| Both sensor LEDs dark | Door may refuse closing | Power or wiring problem | Inspect accessible wiring and connections |
| Diagnostic light after door stops | Door moves partway and stops | Travel, resistance, spring or mechanical issue | Inspect door movement and spring condition |
| Diagnostic light plus humming | Little or no movement | Motor, drive, movement-detection or mechanical issue | Observe rail, trolley and door movement |
| Indicator after new installation | Opener has not operated normally yet | Incomplete setup or programming | Follow exact model programming instructions |
| Main lights flash while sensors are blocked | Door refuses remote closing | Safety reversal system responding | Remove obstruction; do not bypass sensors |
| Intermittent blinking | Problem comes and goes | Marginal alignment, wiring, vibration or model-specific fault | Record when the warning appears |
Safe Checks Las Vegas Homeowners Can Make Before Replacing the Opener
A blinking warning light often provides enough information for useful homeowner troubleshooting without opening the motor housing or touching high-tension garage door components.
Focus first on observation.
- Identify the manufacturer and opener model.
- Determine exactly which light is blinking.
- Count the flashes before the pattern pauses.
- If UP and DOWN arrows flash, record both numbers separately.
- Take a short video of the repeating code if possible.
- Observe whether the garage door is trying to open or close.
- Check whether the problem occurs only during closing.
- Look for objects blocking the safety-sensor beam.
- Check whether both sensor LEDs are illuminated.
- Look for a sensor that is visibly misaligned.
- Clean dusty sensor lenses with an appropriate soft cloth.
- Inspect accessible sensor wiring for obvious cuts or loose connections.
- Check whether a manual garage door lock is engaged.
- Observe whether the garage door moves crookedly.
- Look for a visible gap in a torsion spring without touching it.
- Observe whether the chain, belt, rail mechanism, and trolley move.
- Compare the wall control, remote, and exterior keypad.
- Note whether the opener produces humming, grinding, or clicking.
- Check whether the warning began after programming or electrical work.
- Consult the diagnostic chart for the exact opener model.
Take a Video Before Resetting Anything
This is one of the simplest and most useful steps.
A warning pattern can disappear after the opener is unplugged or reset.
A short phone video showing the flashing sequence can preserve valuable information.
Include the opener controls and, if possible, the garage door behavior in the same recording.
Record Whether the Problem Is Opening or Closing
Direction matters.
A safety-sensor problem is much more closely associated with closing than opening.
A broken spring or drive problem may prevent opening.
A travel issue may affect either direction.
The warning code should always be interpreted together with what the door was attempting to do.
Check the Mechanical Garage Door Too
Do not become so focused on the electronic warning that you overlook the door itself.
A crooked door, broken spring, loose cable, displaced roller, bent track, or engaged lock can produce resistance that the opener detects.
The diagnostic code may be reporting the opener's reaction to a mechanical problem rather than an electronic failure inside the opener.
Do Not Assume a Reset Is a Repair
If a warning disappears after unplugging the opener but returns during the next operating cycle, the underlying condition remains.
Clearing a code is not the same as correcting the reason the code appeared.
What Not to Do When a Garage Door Opener Warning Light Is Blinking
A diagnostic warning should lead to better troubleshooting, not to bypassing safety systems or forcing a damaged garage door to move.
- Do not bypass or permanently defeat safety reversing sensors.
- Do not tape sensor buttons or wiring together to defeat a warning.
- Do not increase opener force to overpower a binding garage door.
- Do not repeatedly cycle a visibly damaged garage door.
- Do not wind or unwind torsion springs.
- Do not adjust spring winding cones.
- Do not loosen cable drums.
- Do not reconnect lift cables that may be under spring tension.
- Do not force a badly off-track garage door.
- Do not stand underneath an unstable door.
- Do not pull the emergency release under an unstable open door.
- Do not open an energized opener powerhead to probe electrical components.
- Do not erase opener programming before recording the diagnostic code.
- Do not replace the complete opener solely because an LED is blinking.
Why Safety Sensors Should Not Be Bypassed
Automatic residential garage door operators incorporate safety systems because a moving garage door can create a serious entrapment hazard.
The U.S. Consumer Product Safety Commission states that automatic residential garage door operators are subject to the federal safety standard in 16 CFR Part 1211.
For federal operator-safety information, see the U.S. Consumer Product Safety Commission guidance for automatic residential garage door operators .
Do Not Use Force Settings to Hide a Mechanical Failure
A garage door opener is not intended to compensate for a broken spring, damaged track, jammed roller, displaced cable, or other mechanical resistance.
If the opener detects excessive force, the correct response is to identify why the door is resisting movement.
Making the motor push harder without fixing the door can create additional damage and may interfere with normal safety behavior.
Blinking Code Keeps Returning After the Sensor Path Is Clear?
If the warning continues after obvious obstructions, alignment, and accessible wiring have been checked, the fault may involve a sensor circuit, travel system, door resistance, motor/drive condition, or opener electronics. Open Sesame Garage Door Repair Las Vegas can help identify the actual system producing the warning before parts are replaced.
How Las Vegas Conditions Fit Into Garage Door Opener Warning-Light Troubleshooting
Las Vegas provides important operating context for garage doors and automatic openers, but local climate should not be used as a shortcut diagnosis.
The National Weather Service describes Las Vegas as a broad desert valley in southern Nevada with abundant sunshine and hot summer temperatures. It also notes that the valley slopes and surrounding mountains create local differences across the region.
That means garage door equipment throughout the Las Vegas Valley can operate in demanding conditions, particularly inside attached garages that receive substantial sun.
A blinking diagnostic light, however, still needs to be interpreted according to the actual opener model and symptom.
Hot Garages
A residential garage can become significantly warmer than the conditioned interior of the house.
The opener motor, logic board, battery backup where equipped, wiring, sensor electronics, rail system, and other components may spend long periods in that environment.
Heat can be relevant to general component wear, but a homeowner should not conclude that “Las Vegas heat damaged the logic board” merely because a warning light appeared.
Read the diagnostic code first.
Direct Sun Near the Garage Opening
Safety sensors mounted close to the garage-door opening may be exposed to bright exterior conditions depending on garage orientation and time of day.
If a sensor-related problem occurs only at particular times, record the pattern rather than assuming the sensor is defective.
The sensor should still be inspected for alignment, wiring, mounting, and manufacturer-specific behavior.
Dust
Dry desert conditions and ordinary garage activity can allow dust to collect on sensor lenses, tracks, opener rails, and other exposed surfaces.
A dusty sensor lens is a simple condition to eliminate during troubleshooting.
Clean gently according to manufacturer guidance rather than spraying electronic sensors with excessive liquid.
Power Interruptions and Electrical Events
If a blinking warning begins immediately after a power interruption, breaker trip, electrical repair, or another electrical event, note that timing.
Some opener systems may need programming verified after certain repairs or component replacements.
That does not mean every outage damages an opener or erases its settings.
Older and Newer Opener Generations
Las Vegas homes can contain garage door openers from very different generations.
An older opener may use a single diagnostic LED and a simple repeating flash sequence.
A newer unit may use UP/DOWN arrows, Wi-Fi-connected diagnostics, a wall console, or application-based alerts.
Two neighbors with the same blinking-light complaint can therefore have completely different diagnostic systems.
Summerlin as a Supporting Service-Area Entity
Summerlin is an important supporting local entity within the broader Las Vegas Valley, but the geographic focus of this article is Las Vegas, Nevada.
The business entity remains Open Sesame Garage Door Repair Las Vegas.
This page does not imply that Open Sesame maintains separate offices in individual Las Vegas communities.
For official regional climate context, see the National Weather Service Climate of Las Vegas .
When Professional Garage Door Opener Diagnosis Makes Sense
Some blinking-light problems can be resolved with straightforward checks.
A trash bin blocking the safety beam does not require complex electronic diagnosis.
A dusty sensor lens or visibly bumped sensor can sometimes be corrected without replacing equipment.
Other warning patterns point toward wiring, mechanical resistance, opener-drive problems, or electronics that require more careful diagnosis.
The Sensor LEDs Will Not Stabilize
If the path is clear, alignment has been checked, and the receiving sensor continues flickering or remains dark, the problem may involve the sensor, mounting, wiring, or opener sensor circuit.
Repeatedly replacing sensors without testing the circuit can waste money.
A Diagnostic Code Returns Immediately
If the warning clears temporarily but returns every time the garage door operates, the opener is detecting a repeatable condition.
Record the code and the exact point in the cycle when it appears.
That information can significantly narrow professional troubleshooting.
The Garage Door Moves Crookedly
A crooked garage door is no longer primarily a blinking-light problem.
It can involve lift cables, spring balance, rollers, tracks, hinges, or door structure.
Stop operation rather than continuing to cycle the opener to see whether a different code appears.
A Spring Is Visibly Broken
Garage door springs counterbalance the weight of the door.
If a spring is broken, do not attempt to correct the resulting resistance through opener force or travel adjustments.
The spring system needs to be addressed.
The Opener Hums but Nothing Moves
A warning code combined with a humming motor and no rail movement can indicate an opener-drive or internal motor problem rather than a safety-sensor issue.
The motor, internal gear system, sprocket, coupler, or electronics may need diagnosis depending on the opener design.
The Opener Produces Smoke or a Burning Smell
Stop operating it.
Disconnect electrical power when it is safe to do so and avoid opening the energized housing.
The Warning Does Not Match the Manual
If the model information and visible light pattern do not match available documentation, professional inspection may be more productive than guessing.
The opener may have replacement parts from a different generation, a logic board that uses a different diagnostic system, or a symptom that is being interpreted as the wrong indicator light.
12 Questions to Ask Before Approving Garage Door Opener Repair
-
Which light is producing the warning?
Ask whether the technician is reading the main opener light, diagnostic LED, adjustment arrows, wall control, or safety-sensor LED. -
What is the exact diagnostic code?
A recommendation should ideally connect to the observed flash pattern. -
Does that code match this opener model?
Diagnostic meanings can vary by manufacturer and generation. -
Is the problem happening during opening or closing?
Direction can help separate sensor problems from mechanical lifting problems. -
Were the safety sensors checked for obstruction and alignment?
This is especially relevant when the door opens but will not close. -
Was the sensor wiring inspected?
A replacement sensor will not solve a damaged wire hidden elsewhere in the circuit. -
Is the garage door mechanically binding?
Track, roller, spring, cable, or lock problems can create opener warnings. -
Is a garage door spring broken?
The opener should not be expected to compensate for failed counterbalance. -
Does the rail drive and trolley move?
This can help distinguish an internal opener problem from a disconnected door. -
Is the repair correcting the cause or only clearing the code?
A warning that immediately returns has not been resolved. -
Why is complete opener replacement being recommended?
Ask which specific component or function makes replacement preferable to repair. -
Will the safety reversal system be tested after the repair?
Automatic opener safety functions should operate correctly when service is complete.
Warning Signs of Poor Garage Door Opener Diagnosis
- The complete opener is condemned without anyone reading the diagnostic pattern.
- Safety sensors are replaced without checking alignment or wiring.
- The warning code is interpreted using a chart for a different opener model.
- A broken spring is ignored while opener force is increased.
- A crooked garage door continues to be operated during diagnosis.
- The suggested solution is to bypass the safety sensors.
- A blinking light is treated as proof that the logic board failed.
- No one checks whether the garage door is mechanically able to move.
- The opener is repeatedly reset without identifying why the code returns.
- The repair recommendation cannot be connected to the observed symptom.
A diagnostic light is valuable because it provides information.
The goal should be to use that information to identify the failed system, not to replace the most expensive component first.
Why Consider Open Sesame Garage Door Repair Las Vegas for a Blinking Opener Warning?
Open Sesame Garage Door Repair Las Vegas is a local garage door repair company serving homeowners and residential property customers in Las Vegas, Nevada and relevant communities throughout the Las Vegas Valley.
A blinking garage door opener light can involve several different systems.
The warning may relate to safety sensors, sensor wiring, travel controls, door resistance, opener programming, the trolley and rail drive, the motor, or another electronic component.
The correct repair depends on identifying which warning is being displayed and what the garage door is doing at the same time.
For example, a garage door that opens normally but refuses to close while the sensor LED flickers should not be diagnosed the same way as an opener that hums without moving the rail.
Likewise, a garage door that rises several inches and stops with a visibly broken spring should not be treated as a sensor-alignment problem simply because a diagnostic light also appears.
A useful diagnostic process connects:
the warning light → the opener model → the flash pattern → the direction of travel → the mechanical garage door condition → the failed component.
Homeowners looking for garage door opener repair in Las Vegas can contact Open Sesame Garage Door Repair Las Vegas to discuss the warning pattern and current service availability.
Call (702) 888-0842 .
Garage Door Opener Repair Context in Las Vegas, Nevada
The primary geographic focus of this article is Las Vegas, Nevada.
Open Sesame Garage Door Repair Las Vegas serves homeowners and residential property customers in Las Vegas and relevant Las Vegas Valley communities.
The broader local entities used in this article include Las Vegas Valley, Clark County, and the primary 89128 ZIP context supplied for the business.
Summerlin may also appear as a supporting service-area entity when contextually relevant.
The supplied business information identifies: 7865 Bluewater Dr, Las Vegas, NV 89128.
This article does not characterize that address as a showroom, walk-in retail location, or public customer-service counter.
It also does not create separate business locations in Summerlin or other Las Vegas communities.
Regardless of the specific Las Vegas Valley neighborhood, the same technical rule applies: the meaning of a blinking opener light should be determined from the actual opener system rather than geographic assumptions.
Frequently Asked Questions About Blinking Garage Door Opener Lights in Las Vegas
Why is my garage door opener light blinking?
A blinking garage door opener light usually means the opener has detected a condition that needs attention, but the exact meaning depends on the model and which light is flashing. Common categories include safety-sensor problems, damaged wiring, travel or resistance faults, programming issues, motor or drive problems, and model-specific diagnostic codes. Count the flashes before resetting the opener.
Why is my garage door opener light flashing and the door will not close?
A safety reversing sensor problem is one common cause, particularly when the garage door opens normally but refuses to close. Check whether an object blocks the sensor beam, whether the sensors are aligned, whether their LEDs are illuminated, and whether accessible wiring appears damaged. The exact flash pattern depends on the opener model.
What does it mean when the safety sensor light is blinking?
A blinking or flickering safety-sensor LED can indicate that the receiving sensor is not seeing a stable beam. Obstruction, misalignment, loose mounting, dirty lenses, wiring damage, or a sensor fault may be involved. Because LED colors and behavior vary by manufacturer, compare the indicator with the manual for the installed opener.
Should I count the flashes on my garage door opener?
Yes. Many garage door openers use a repeating flash pattern as a diagnostic code. Count the flashes before the pause and wait for the pattern to repeat. On systems using UP and DOWN arrow indicators, record both numbers separately. A short phone video can preserve the code before the opener is reset.
Why are the UP and DOWN arrows blinking on my garage door opener?
On supported opener models, the UP and DOWN arrow lights can form a two-part diagnostic code. The number of UP flashes combined with the number of DOWN flashes identifies a specific fault category. The code may relate to sensors, travel, door resistance, motor movement, or another system. Use the diagnostic chart for the exact opener model.
Can a broken garage door spring cause a diagnostic light to blink?
It can contribute to an opener warning if the broken spring makes the garage door too heavy or creates abnormal resistance. Springs counterbalance garage door weight, and the opener is not intended to compensate for a failed spring system. If a spring is visibly broken, stop operating the opener rather than adjusting force or travel settings.
Can I reset the opener to stop the blinking light?
You can sometimes clear a displayed warning by cycling power, but that does not repair the condition that caused it. Record the diagnostic code before resetting the opener. If the warning returns during the next operating cycle, the underlying sensor, wiring, mechanical, programming, or opener problem still needs diagnosis.
Does a blinking light mean my garage door opener needs replacement?
No. A blinking light alone does not mean the entire opener has failed. The warning could involve something as simple as a blocked sensor or something more involved such as wiring, travel, door resistance, motor, or control-system trouble. Identify the exact code and failed component before deciding between repair and replacement.
Can Las Vegas heat make the opener warning light blink?
Las Vegas has a hot desert climate and garage equipment may operate in very warm conditions, but heat should not automatically be blamed for a specific diagnostic warning. Read the opener's actual code and inspect the sensor, wiring, door movement, and mechanical system. Local climate is useful operating context, not a substitute for diagnosis.
When should I call a garage door repair company for a blinking opener light?
Professional diagnosis makes sense when the code repeatedly returns, the sensor circuit cannot be restored, the garage door is crooked or unusually heavy, a spring or cable is damaged, the opener hums without moving, the unit produces a burning smell, or the diagnostic pattern cannot be matched confidently to the opener model. Open Sesame Garage Door Repair Las Vegas can be reached at (702) 888-0842 to ask about current service availability.
Open Sesame Garage Door Repair Las Vegas on Google Maps
The supplied business information identifies: 7865 Bluewater Dr, Las Vegas, NV 89128.
This page does not characterize that address as a showroom, walk-in office, retail storefront, or public customer-service counter.
View Open Sesame Garage Door Repair Las Vegas on Google Maps
Garage Door Opener Light Still Blinking in Las Vegas?
A repeating opener warning is useful information. The important step is to determine exactly which light is blinking, record the flash pattern, identify the opener model, and compare the warning with what the garage door is doing.
The cause may involve the safety reversing sensors, sensor wiring, travel controls, garage door resistance, a broken spring, opener programming, the motor or drive system, or another electronic component.
Open Sesame Garage Door Repair Las Vegas can help diagnose the warning before sensors, opener parts, or the complete garage door opener are replaced.
If the garage door is crooked, unusually heavy, off track, supported by a loose cable, or showing a visibly broken spring, stop operating the system instead of repeatedly trying to clear the warning.
Open Sesame Garage Door Repair Las Vegas
Las Vegas, NV 89128
Las Vegas Valley • Clark County
(702) 888-0842
bestgaragedoorrepairsummerlinnv.com